Rulers are useful for almost any project you are working on in Photoshop.
They allow you to quickly add guides and fine-tune your text and design layouts to perfection.
Here is a quick look at how to turn the rulers on in Adobe Photoshop.
Table of Contents
How to show rulers in Photoshop
- Open your Photoshop project
- Make the rulers visible by clicking Command + R on Mac, Control + R on PC
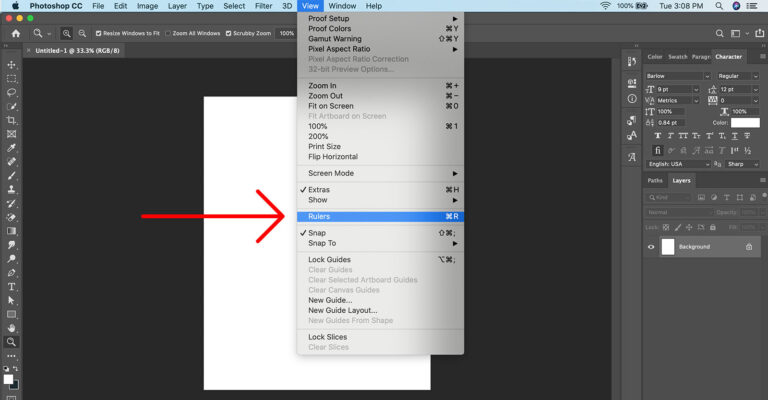
- Or by selecting View > Rulers from the top menu
Why we use rulers
Rulers have a variety of uses in Photoshop. For example, if you are working on a project with a lot of different objects and text, the ruler can help you align and place these items.
When you turn on the ruler you will have bars on both the vertical and horizontal rulers to show you where your cursor is located.
This can be extremely useful when creating new shapes or lines of text as it will indicate the size of your new shape as you draw it in Photoshop.
How to change units of measurement
Photoshop typically sets the units of measurement of the rulers to pixes automatically.
If you wish to change the ruler to inches or centimeters or another unit of measurement, follow these easy steps:
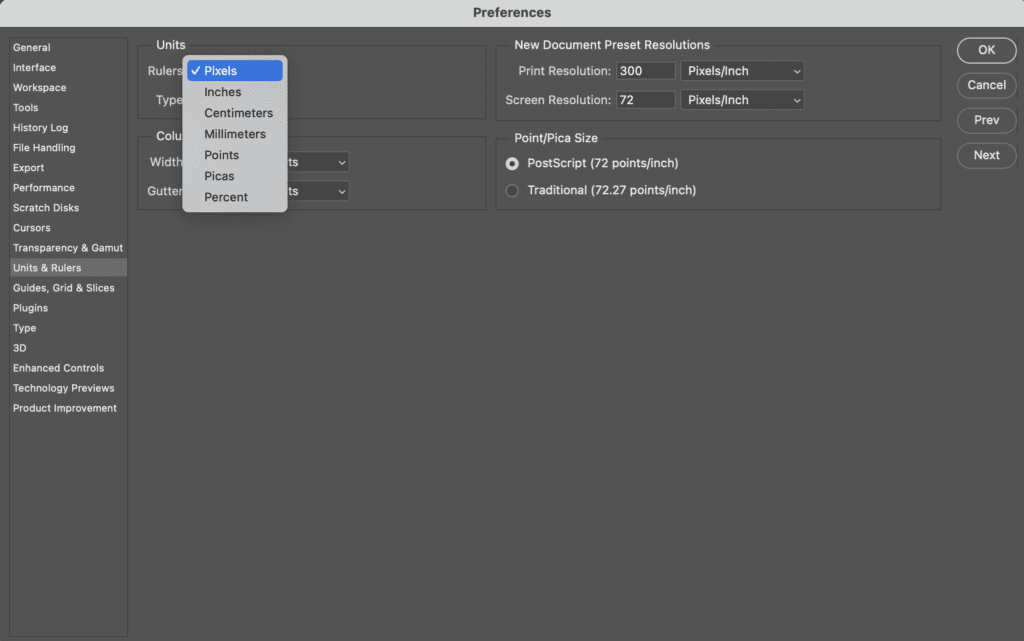
- In the Top Menu, click Photoshop
- Hover over Preferences > General
- Select the Unit & Measurement
- In the Units section, select your choice of unit measurement next to Rulers
- Click OK once finished
Use guides, snap, grids in Photoshop:
There are additional features in Photoshop that you can utilize with rulers to help make objects and shapes accurately and efficiently.
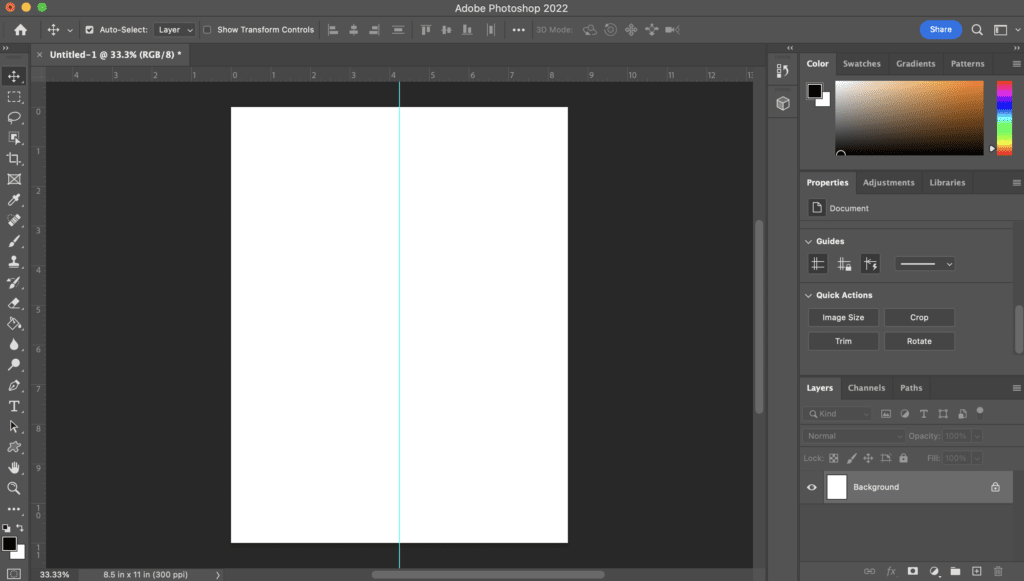
The first are guides which are lines that help you mark a certain point on your board.
You can place multiple guides on a single project, which is extremely useful in helping with the symmetry of a project.
Here is how to make a guide
- In the Top Menu click View
- Select New Guide and choose if you want it horizontal or vertical
- Click OK and your guide will appear, you can move your guide manually by selecting the Move Tool (V) and Clicking-and-Dragging
Once you are done with your guides simply select View > Clear Guides to remove them.
If you wish to learn more about guides and how to utilize smart guides in Photoshop, click here.
Next are grids which are similar to guides except they cover the whole project rather than a single line.
How to activate a grid in Photoshop
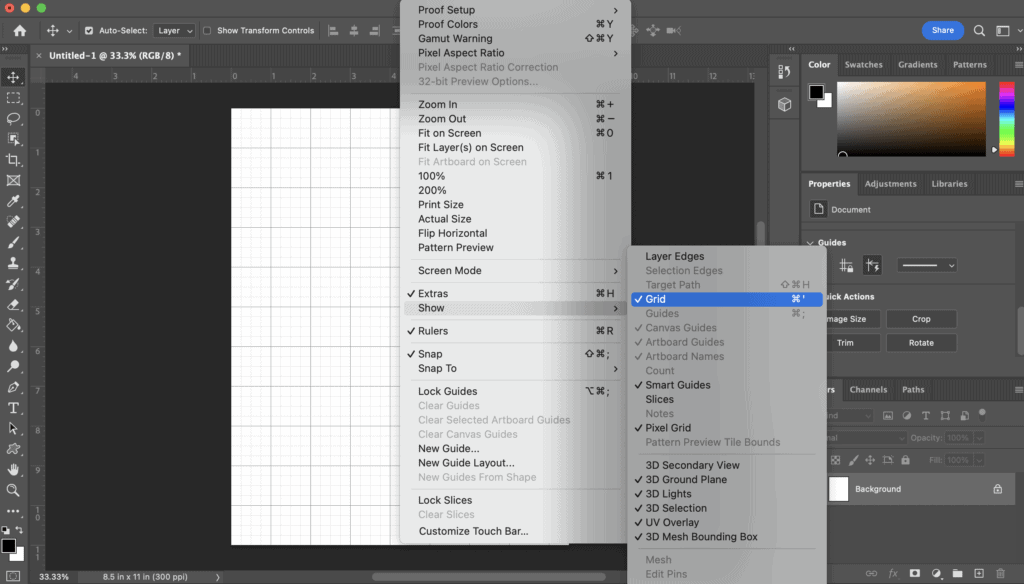
- In the Top Menu hover over View
- Select Show > Grid
- Or select Command + ‘ to show the grid
Follow the same steps to remove the grid once you are finished.
Once you have made your guides or grid, you now have the option to ‘Snap’ objects in place on your guides.
Snapping is exactly as the name sounds; the objects will automatically fit into place on the guides or grid you’ve made.
Follow these steps to easily snap an object into place:
- In the Top Menu, hover over View
- Select Snap and make sure the checkmark is there
- Select Snap To and Choose what you would like your object to snap to
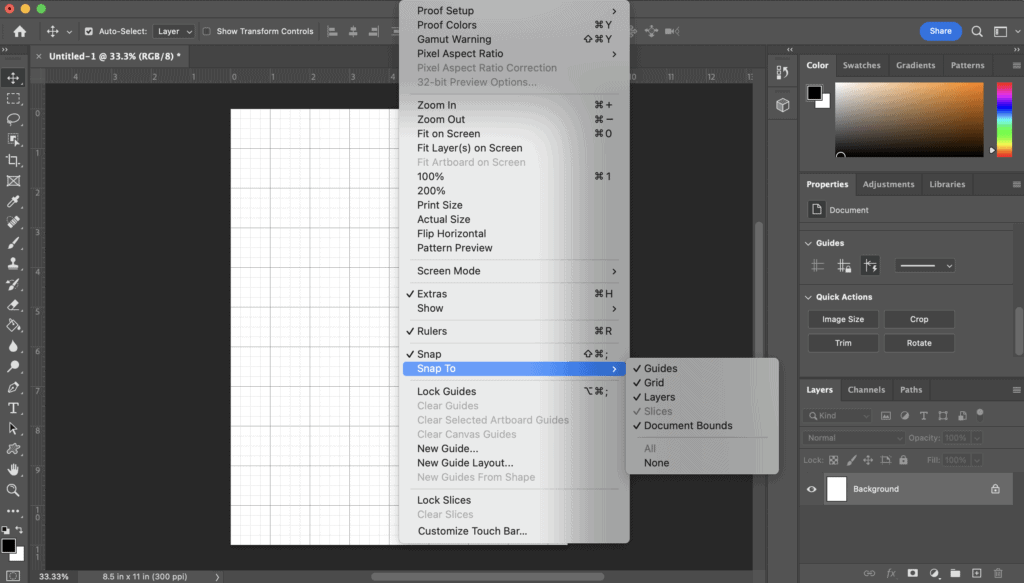
If you do not want your objects to snap into place, simply Uncheck the snap option to be able to move them freely.
How to hide rulers
Once you are done using your rulers and decide you wish to hide them again, follow the same steps you used to activate them initially.
- Hide the rulers by clicking Command + R on Mac, Control + R on PC
- Or by selecting View > Rulers from the top menu and Unchecking the Rulers tab
You can easily tab your rulers on and off as you please without affecting your project at all.
👍 Support Us: Subscribe to our channel and help us continue providing these tutorials.
🌟 Regular Updates: We publish how-to videos for Photoshop regularly!
🔧 Expert Guidance: Learn Photoshop from our professionals and uncover exclusive tips!