
Table of Contents
Want to move artboards around in Adobe Photoshop?
While artboards are not the default option in Photoshop, they are still a great way to manage larger projects with multiple components or variations of the same layout.
Using artboards in Photoshop is a little different than in Illustrator, but the same basic process applies.
In this mini-tutorial, I will show you the basics of rearranging and moving artboards around in the Photoshop Document Window.
Here's how to do it
- Open your Adobe Photoshop project file
- If you don't already have artboards set up, do so by converting your canvas to an artboard using the Layer > New > Artboard option from the top Menu Bar
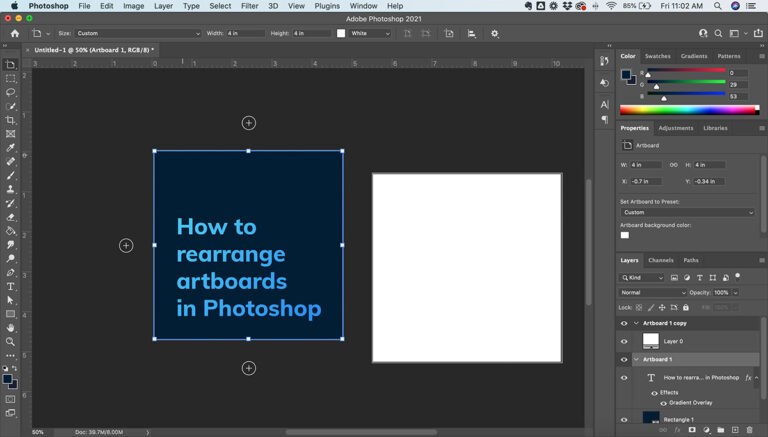
- With the Move Tool (V), select the artboard you want to move by clicking right at the edge of the artboard or the name of the artboard
- Then, just drag-and-drop to move the artboard anywhere inside the document window workspace
Why we move artboards
Moving an artboard can be necessary for a variety of reasons. If you are working on a large-scale project for example, and need to move some pieces around, you can easily rearrange your artboards.
Additionally, it's helpful to be able to move artboards when you are resizing your work. If your project expands and you need to make one artboard larger, being able to easily move the other artboards is imperative.
Resizing artboards
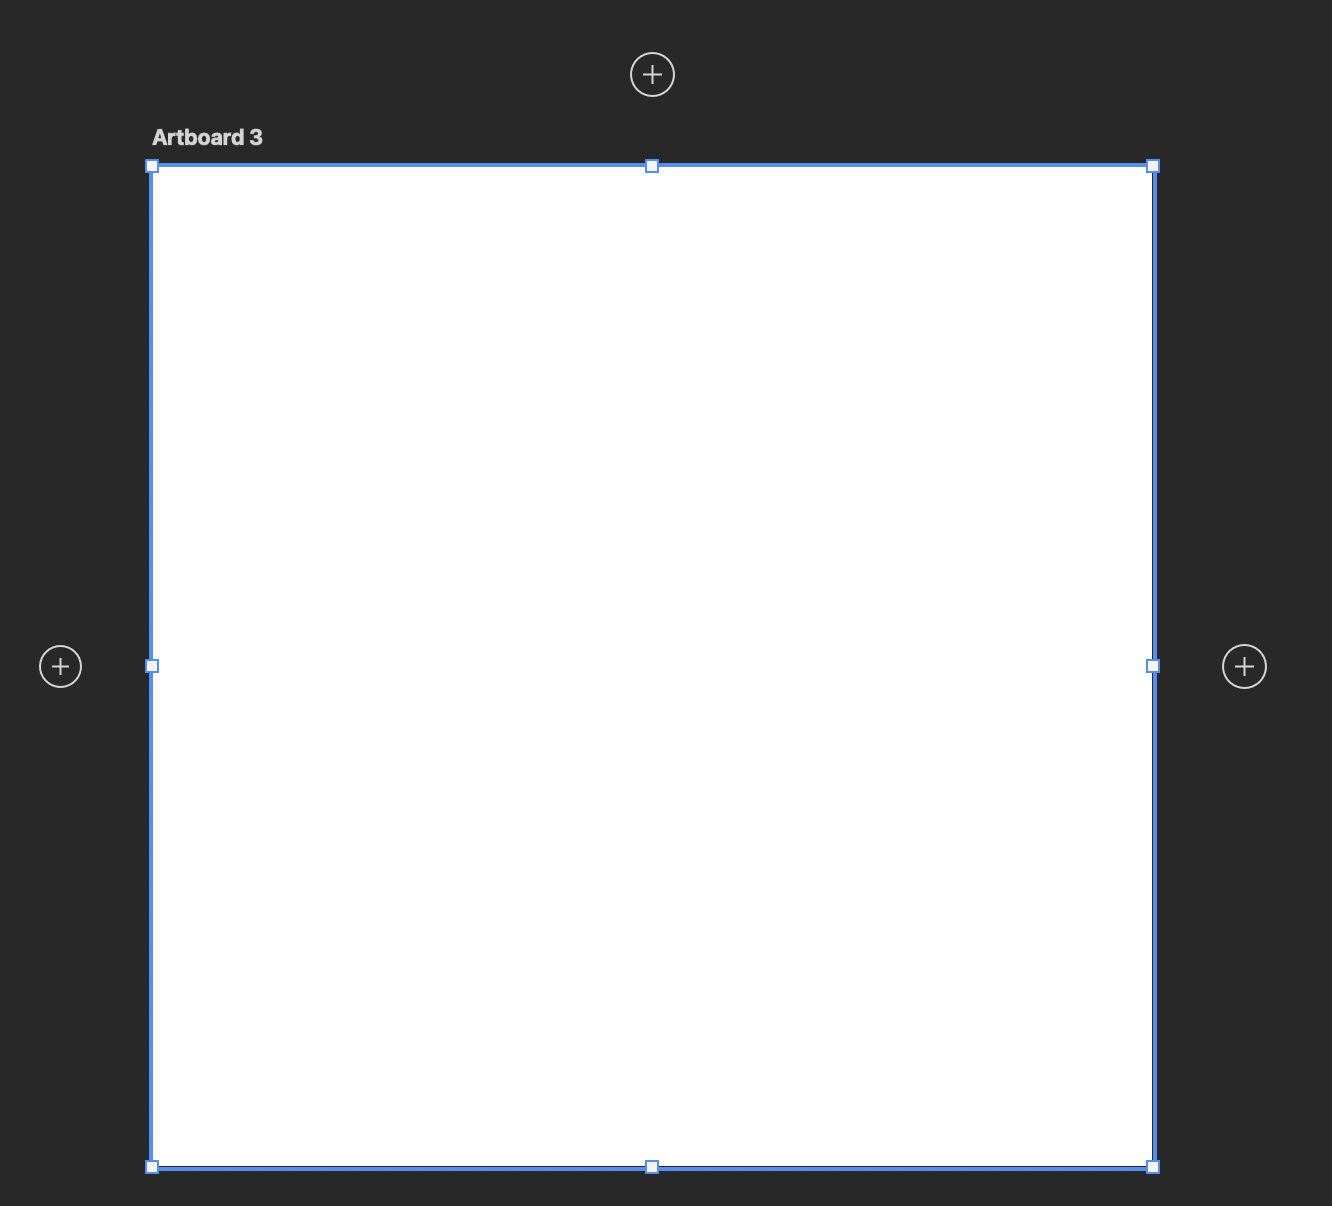
Resizing artboards in Photoshop is incredibly easy. You can manually adjust the artboard by simply Clicking + Dragging the sides or corner handles as shown below.

Simply select the artboard you wish to resize and drag any of the handles or white squares along the border.
Don’t worry about any shapes or drawings you have in the artboard. Adjusting the size of an artboard does not warp the objects within it.
Moving multiple artboards simultaneously
If you have multiple artboards that you wish to move together at the same time, follow these steps:
- Select all the artboards you wish to move by clicking and holding Shift
- Alternatively, you can select all the artboards in the Layers Panel
- Once selected, Click and Drag one of the artboards and the rest will follow
Remember, if you are having trouble moving an artboard, make sure you are clicking the Name of the artboard to move it. This is different from moving artboards in Illustrator.

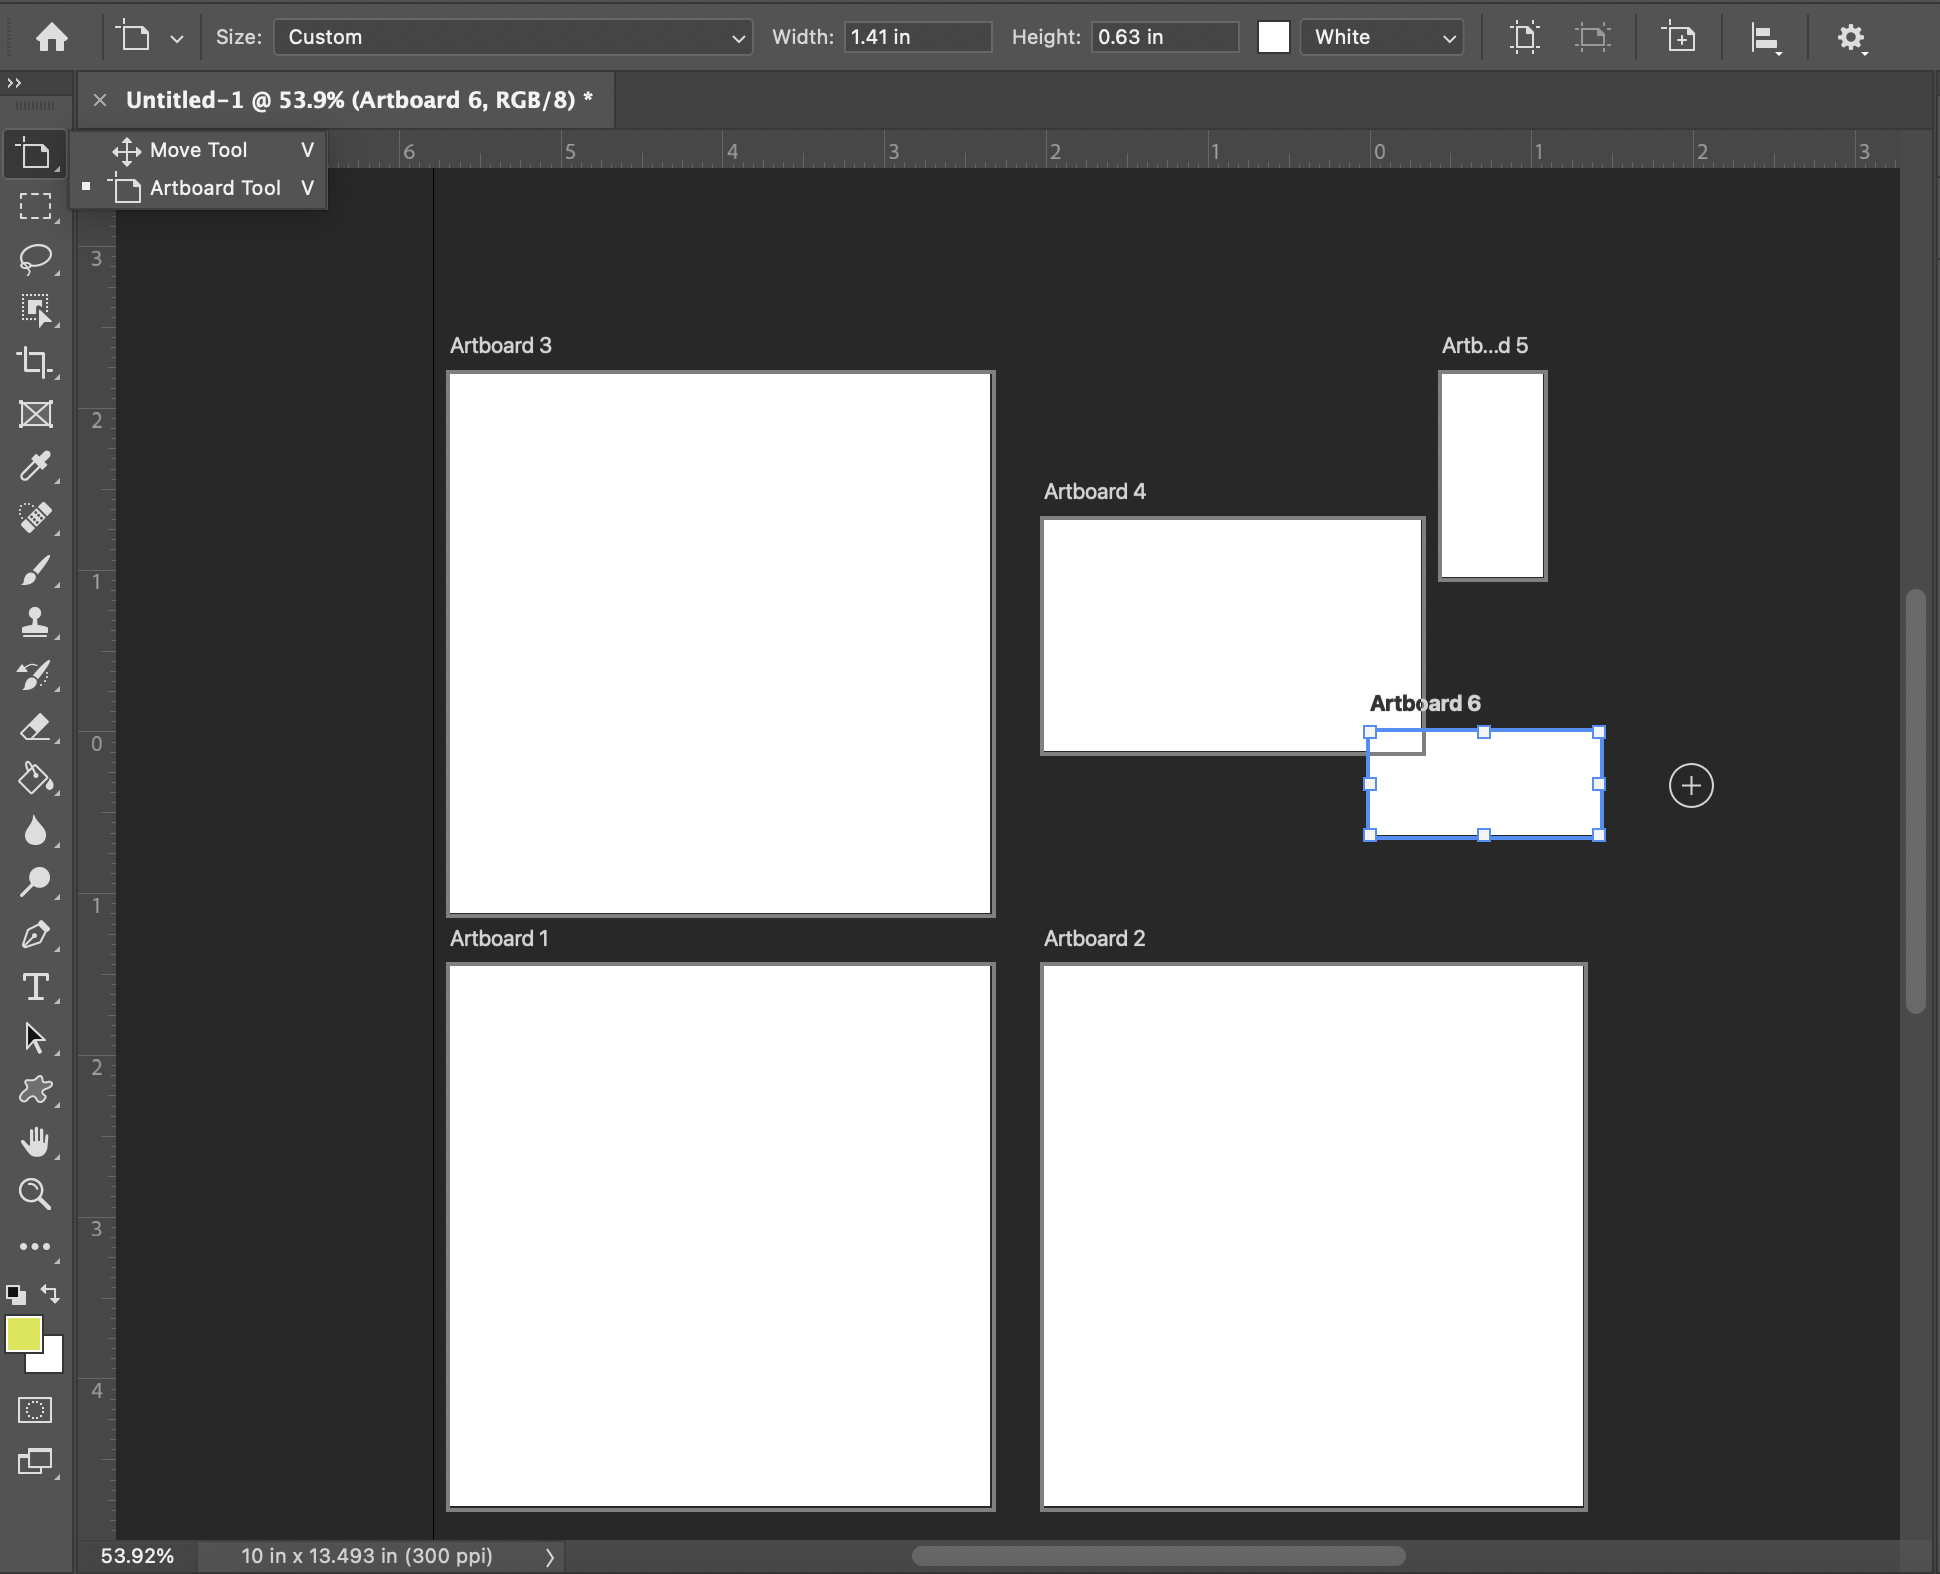
Pro-tip: You can make multiple artboards of the same size in a grid pattern by following these steps.
- Select the artboard you wish to duplicate and Double-Click the Border
- Circles with plus signs in the middle will appear on all sides as shown below
- Click a plus sign to create a new artboard, evenly spaced from the other artboards
Stacking artboards
If you want to get creative you can try stacking artboards in photoshop. You can create unique graphics and designs by layering artboards.
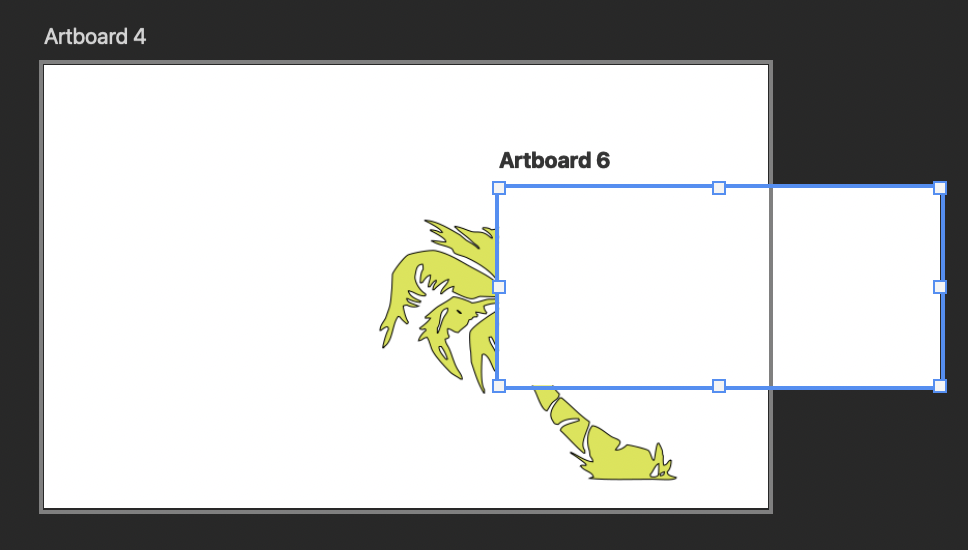
Be warned that putting an artboard on top of another will completely cover any objects on the lower artboard as shown above.
If you are having trouble creating or moving artboards in Photoshop, be sure to select the Artboard Tool (Shift + V) to assist you.
Deleting unwanted artboards
Deleting artboards is incredibly easy. All you have to do is select the artboard you wish to delete and hit delete. Make sure you move any objects that you don’t want to be deleted out of that artboard before you delete it.
👍 Support Us: Subscribe to our channel and help us continue providing these tutorials.
🌟 Regular Updates: We publish how-to videos for Photoshop regularly!
🔧 Expert Guidance: Learn Photoshop from our professionals and uncover exclusive tips!