

Gradients are cool effects, and can add a nice touch of depth or style to your illustration or logo — but how do you do it?
In this short tutorial we'll cover the basics of adding a gradient inside Adobe Photoshop.
Here's how to do it:
- Open your Photoshop project file and select the object you want to apply a gradient to
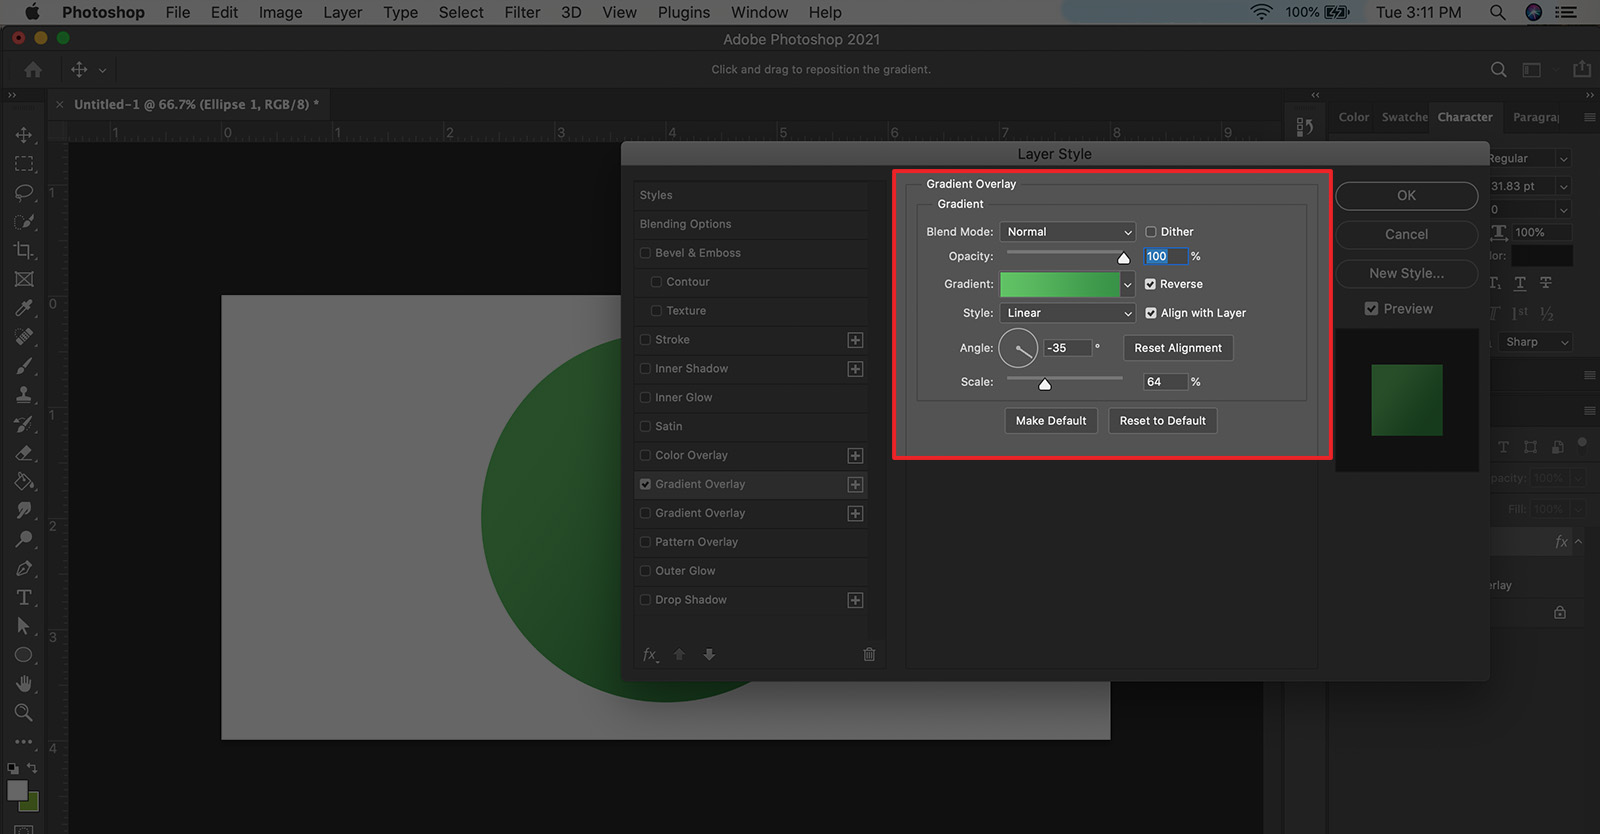
- From the top menu panel by selecting Layer > Layer Style > Gradient Overlay
- In the Layer Style settings window, select the colors you want using the "Gradient" color picker. Lastly, fine-tune the look of the gradient by adjusting the Opacity, Style, Angle, and Scale of the effect. If you enable the Preview option, you will see the style changes in real time.
- Click OK
Quick Tip: If you want to apply the same gradient effect to multiple layers, choose "Make Default" button from the Layer Style window before you click OK. Then when you go to add a gradient to another layer, just click the "Reset to Default" button, and all of your previous settings will appear
×
Support us by Subscribing to our YouTube Channel
👍 Support Us: Subscribe to our channel and help us continue providing these tutorials.
🌟 Regular Updates: We publish how-to videos for Photoshop regularly!
🔧 Expert Guidance: Learn Photoshop from our professionals and uncover exclusive tips!