
Rotating objects in Adobe Illustrator can be quickly done using the Move Tool and dragging any of the corner handles around in a circle.
If, however, you want to rotate an object to an exact degree measurement, this tutorial can help.
Table of Contents
How to rotate an object in Adobe Illustrator
With the Move Tool
- Open your Illustrator project file
- Select or create the layer, shape, or image that you want to rotate
- With the Move Tool active (shortcut M), click-and-drag any of the four corner handles around the object and move your cursor around to rotate
From the Top Menu (exact degree rotation)
- Open your Illustrator project file
- Select or create the layer, shape, or image that you want to rotate
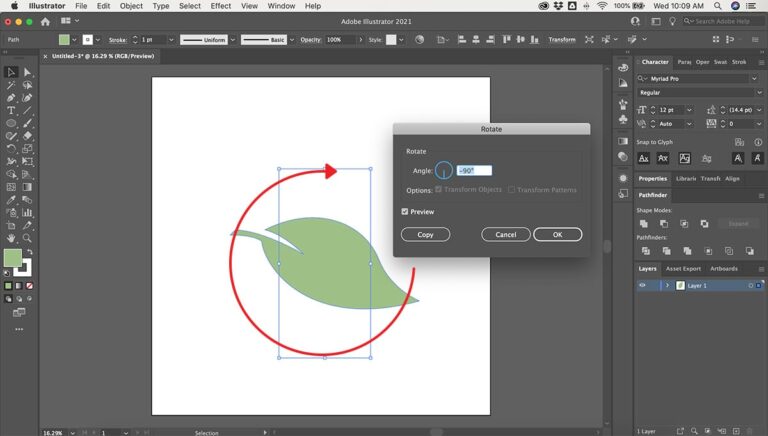
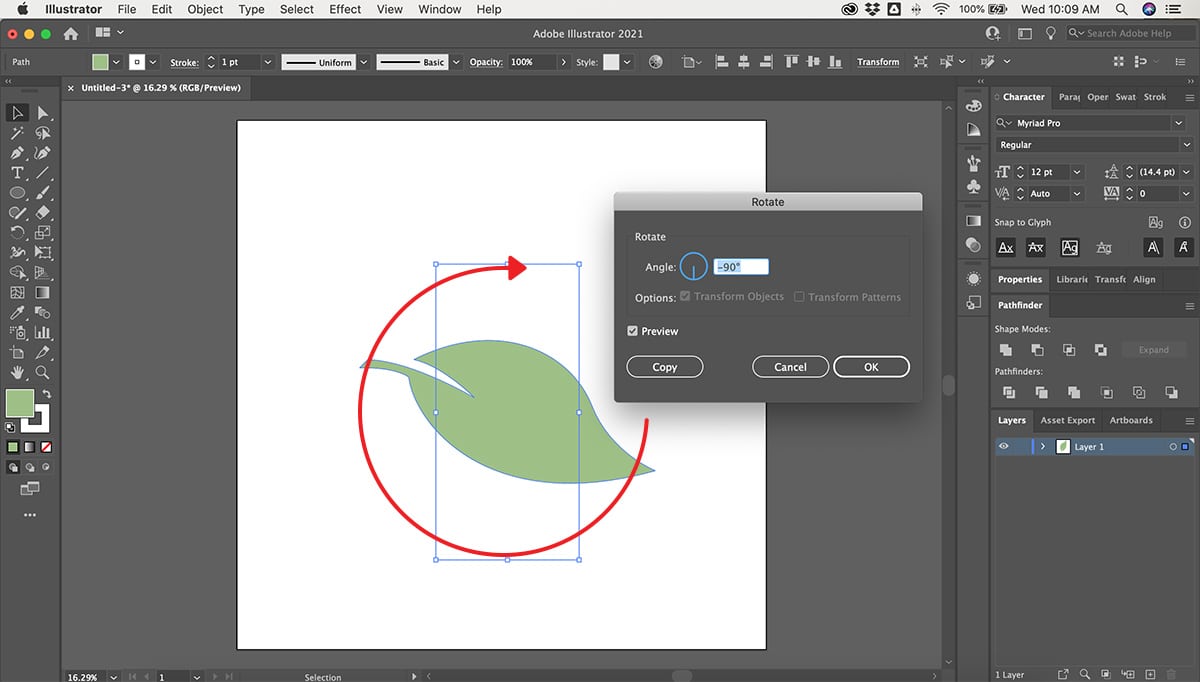
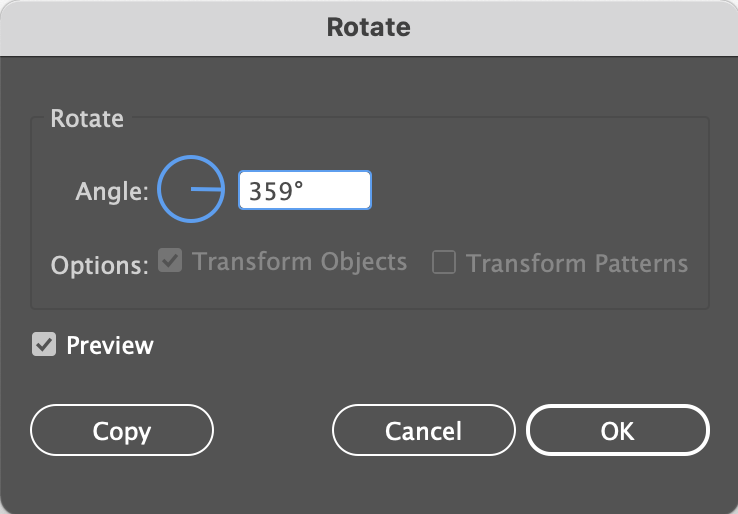
- From the top menu, choose Object > Transform > Rotate
- From the Rotate popup window, set your degree of rotation and click OK
What can be rotated in Illustrator?
Luckily, pretty much every object in Illustrator can be rotated. This includes text, images, canvases, etc.
Rotating is an important part of designing a project. Especially if your project has a variety of shapes or you are designing a logo. The angle of rotation of your image or shape is extremely important.
How to rotate text
Rotating text in Illustrator is similar to rotating an object as we just showed above, but with the added trick of making sure your text moves with the rotation.
If you attempt to rotate your text by simply clicking the white squares on the blue border and dragging, the text will remain horizontal as shown below.
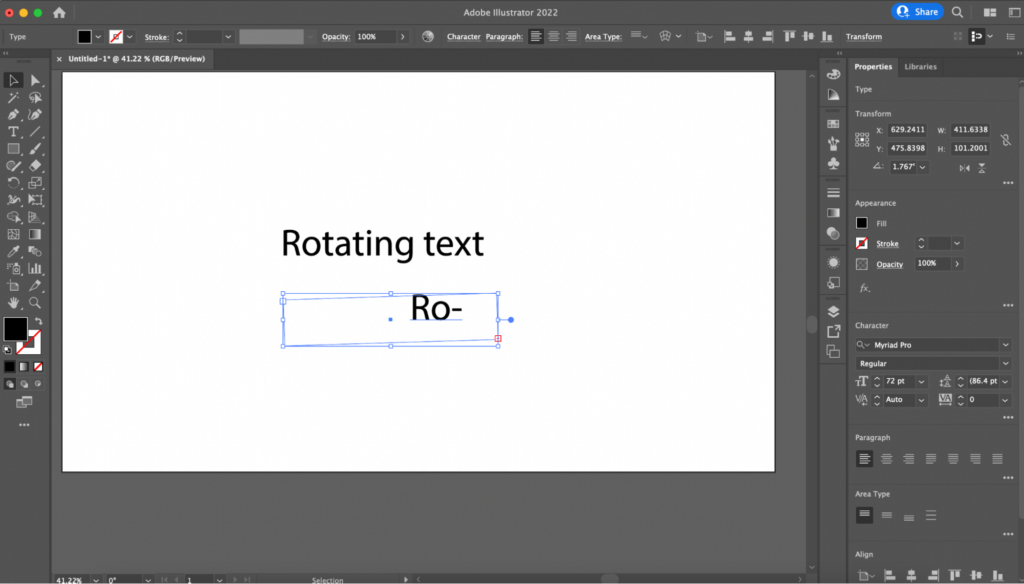
As you can see, the text remains horizontal on the x-axis and disappears outside of the border.
Here is how to rotate text without this issue:
- Select the text you wish to rotate
- In the top menu, click Object
- From there, hover over Transform and click Rotate
- Enter the angle you wish to rotate your text too
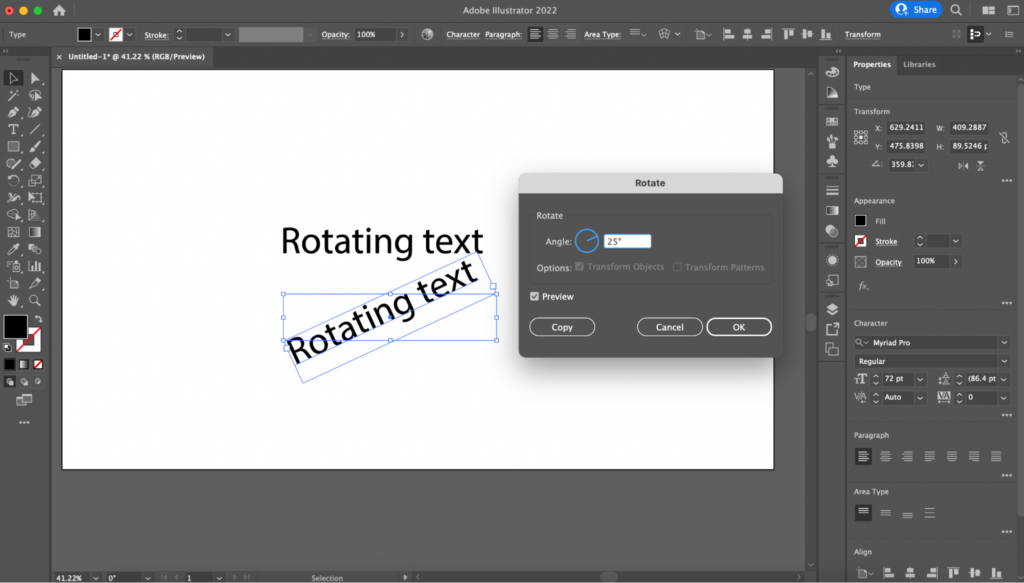
Your text will rotate alongside the border and remain in view.
How to rotate an artboard
If you are working with multiple artboards or need to rotate your artboard for any reason, there is a method to easily rotate how you view the canvas. You cannot actually rotate the artboard itself, rather you are rotating how you view the artboard.
If you need assistance in making the artboard itself, be sure to check out this article for more information: How to create an artboard in Illustrator
Here is how to rotate an artboard:
- Select the artboard you are using (Shift + O)
- Click the Rotate View Tool (Shift + H)
- Click and drag the artboard to rotate how you view it
How to rotate an image
If you want to rotate an image, simply follow one of the two methods we outlined in this article.
- Method 1: Utilize the Move Tool (M) and Click and Drag the image to rotate
- Method 2: Utilize the top menu, choose Object > Transform > Rotate and enter the degree of rotation you desire
Rotating with the hand tool
Rotating with the hand tool is a method to rotate the way you view the object, as previously mentioned when we rotate artboards.
While you cannot rotate with the Hand Tool (H) alone, you can rotate with Rotate View Tool (Shift + H) which is a subset of the hand tool. Just using the Hand Tool (H) allows us to click and move the project, but does not provide the ability to adjust the rotation.
Rather the Move Tool (M) lets us adjust the rotation of an individual object, while the Rotate View Tool (Shift + H) allows us to rotate the project as we view it.
Rotating with your mouse
It is possible to rotate an object by only using your mouse and no keys. How to do it is similar to the second method outlined above.
- Right-click the object you wish to adjust
- From the pop-up menu click Transform
- From the secondary pop-up click Rotate
From here, if you insist on not using your keyboard you can adjust the rotation by clicking on the Circular Angle Graph in the Rotate Panel. As shown below in blue.
Visual rotations
If you want to visually see how an object looks rotated without actually adjusting the rotation, here is the best method to test out different rotations.
- Optional: Create a separate Artboard and Click-and-Drag or Copy and Paste the object you want to test
- Select the Rotate View Tool (Shift + H)
- Click-and-Drag the mouse to see how the object rotates
The whole artboard will rotate instead of the individual object, this allows you to see how a rotation may look before you actually rotate.
Pro-tip: If you do make a rotation that you want to reverse, but you don’t remember the exact angle it was at before, simply click Command + Z to undo the rotation.
👍 Support Us: Subscribe to our channel and help us continue providing these tutorials.
🌟 Regular Updates: We publish how-to videos for Adobe Illustrator regularly!
🔧 Expert Guidance: Learn Illustrator from our professionals and uncover exclusive tips!
